First Experiment#
This page describes how to get started with Covalent. Follow the procedures on this page to:
Install Covalent;
Start the Covalent server;
Run a workflow using Covalent; and
View the workflow using the browser-based interface (GUI).
Installing Covalent#
Before you start
Ensure you are using a compatible OS and Python version. See the Compatibility page for supported Python versions and operating systems.
You can install Covalent using Pip, the Python package manager, or you can download the Covalent source repository from GitHub and build Covalent yourself. Unless you are contributing to Covalent or have some other compelling reason to build from source, we strongly recommend using Pip. To build from source, see Building and Installing Covalent from Source.
Important
If you are upgrading Covalent from a previous stable release, refer to the migration guide to preserve your data and avoid upgrade problems.
Installing with Pip#
To install Covalent, use Pip.
$ pip install covalent
Validating the Installation#
Optionally, validate the installation.
$ python -c "import covalent"
Starting the Server#
Start the Covalent server from the command line.
$ covalent start
Covalent server has started at http://localhost:48008
At any time, you can verify that the server is running by typing:
$ covalent status
Covalent server is running at http://localhost:48008.
Stopping the Server#
When you are done using Covalent to run workflows, stop the server.
Warning
Do not stop the server while you have running workflows. Stopping the server will kill the workflows.
$ covalent stop
Covalent server has stopped.
Managing the Server#
Use the Covalent CLI tool, covalent, to manage the Covalent server. You can start and stop the server, view its status, and view the server logs.
$ covalent --help
Usage: covalent [OPTIONS] COMMAND [ARGS]...

Covalent CLI tool used to manage the servers.

Options:
-v, --version  Display version information.
--help         Show this message and exit.

Commands:
logs     Show Covalent server logs.
purge    Shutdown server and delete the cache and config settings.
restart  Restart the server.
start    Start the Covalent server.
status   Query the status of the Covalent server.
stop     Stop the Covalent server.
You can also view help for any subcommand. For example:
$ covalent stop --help
Usage: covalent stop [OPTIONS]

    Stop the Covalent server.

    Options:
    --help  Show this message and exit.
Running a Workflow#
Follow the steps below to run an example workflow.
Before you start
Ensure that you have installed Covalent and started the Covalent server.
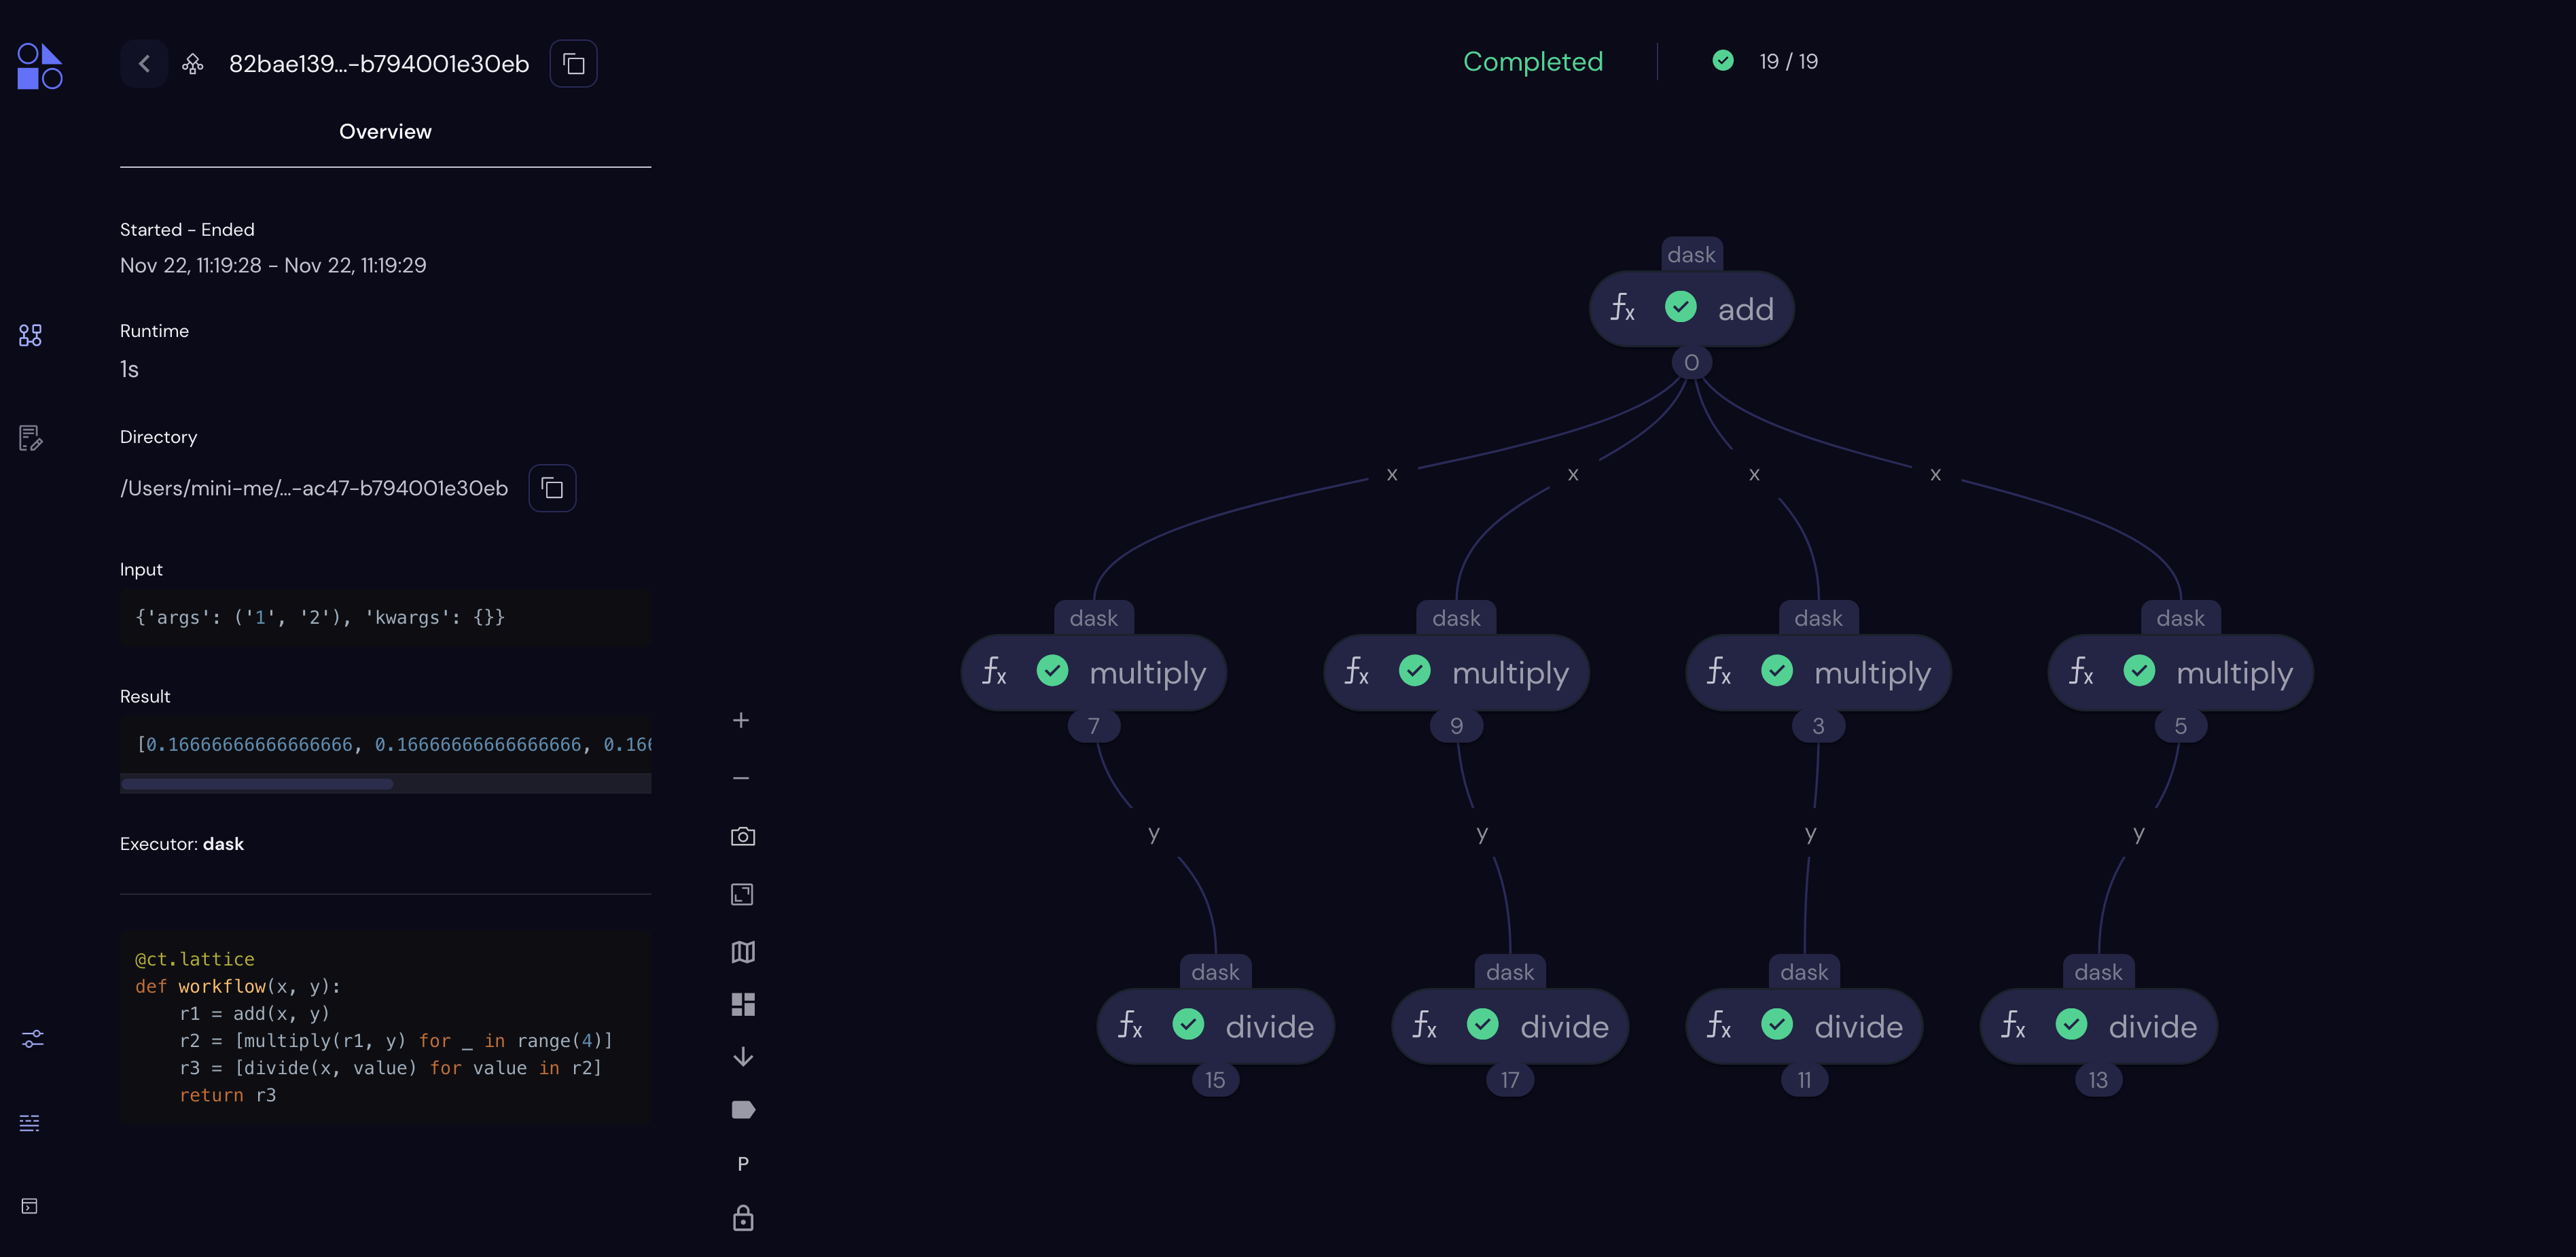
Type (or paste) the following Python code:
import covalent as ct

local = ct.executor.LocalExecutor()

# Construct manageable tasks out of functions
# by adding the @covalent.electron decorator
@ct.electron(executor=local)
def add(x, y):
   return x + y

@ct.electron(executor=local)
def multiply(x, y):
   return x*y

@ct.electron(executor=local)
def divide(x, y):
   return x/y

# Construct the workflow by stitching together
# the electrons defined earlier in a function with
# the @covalent.lattice decorator
@ct.lattice
def workflow(x, y):
   r1 = add(x, y)
   r2 = [multiply(r1, y) for _ in range(4)]
   r3 = [divide(x, value) for value in r2]
   return r3

# Dispatch the workflow
dispatch_id = ct.dispatch(workflow)(1, 2)
result = ct.get_result(dispatch_id)
print(result)
See Local Executor for a description of the executor object assigned to each of the electrons. For demonstration purposes, this example assigns the same simple executor to each electron (LocalExecutor just runs the electron on the local host, relying on default process management). However, much of the power of Covalent comes from the ability to assign each electron a different executor, running different tasks on an arbitrary combination of different task managers on remote hosts, including AWS, Slurm, and many others. See Executors for a list.
See Results for a description of the result object returned by Covalent.
Viewing the Workflow#
Do the following to view your workflow in the GUI.
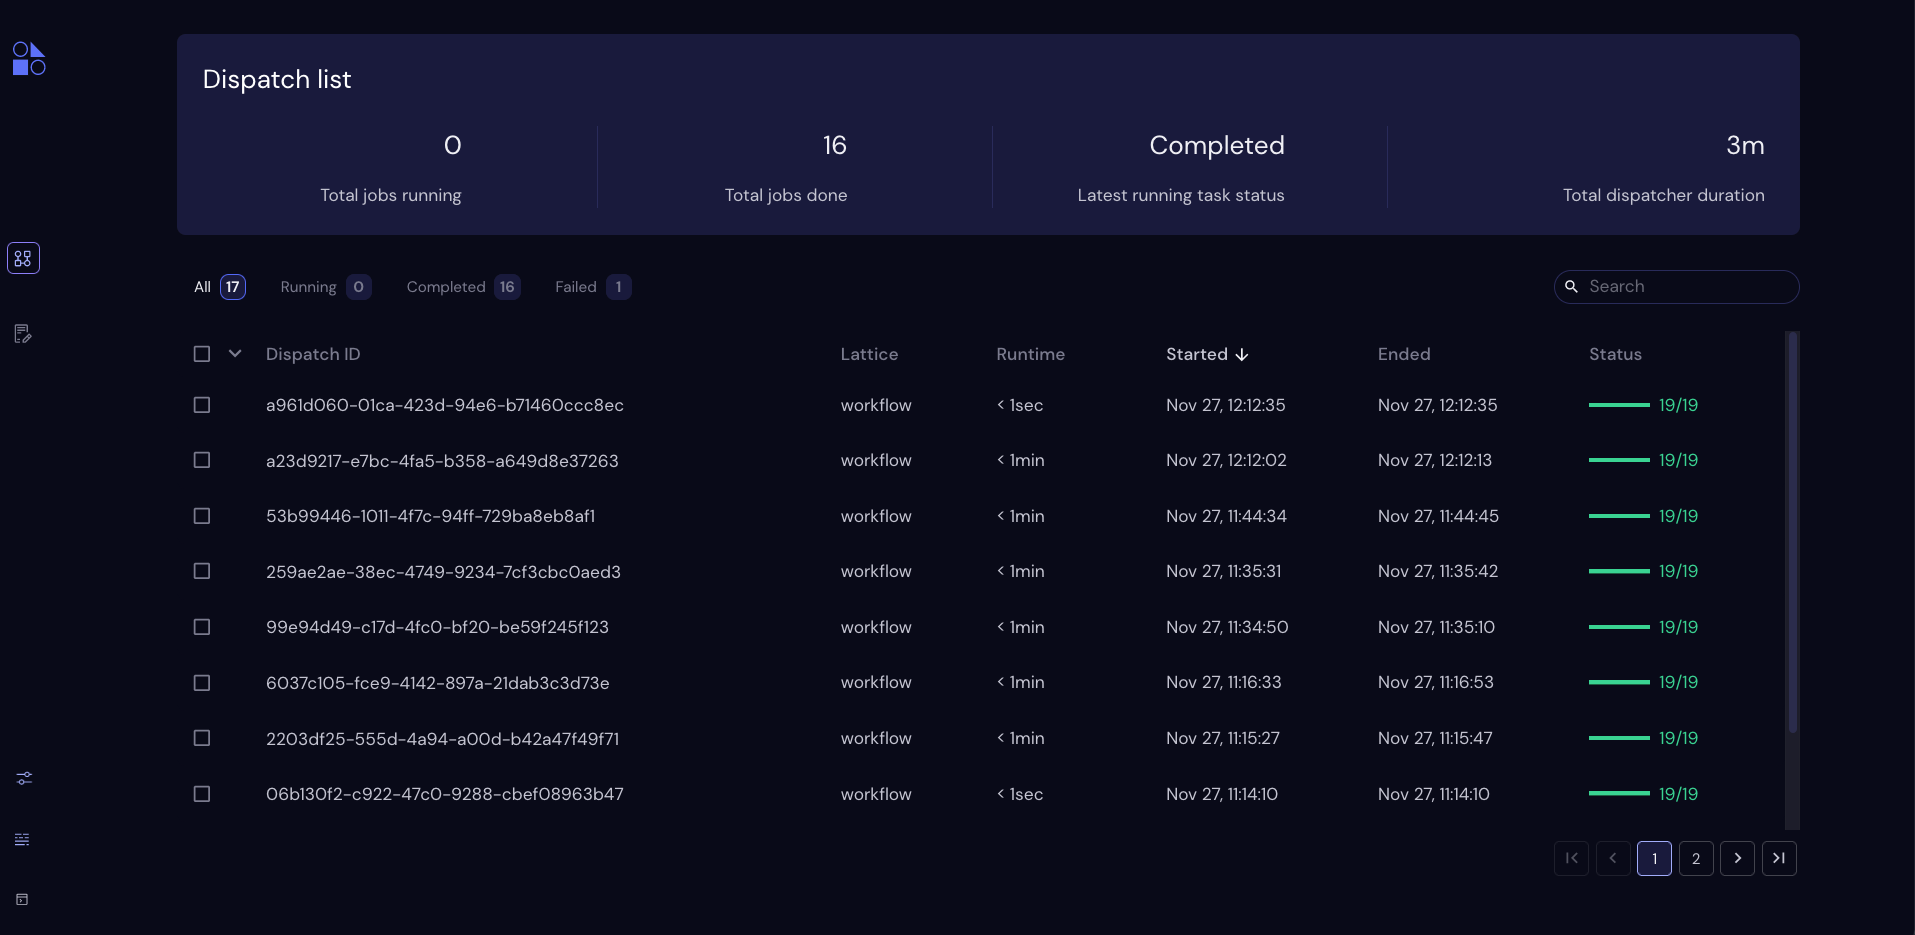
Note
This simple workflow finishes quickly (less than one second, as shown above.)
sleep() statement to prolong execution so you can see the workflow running in the UI.Modify the example code as follows:
import covalent as ct
import time

# Construct manageable tasks out of functions
# by adding the @covalent.electron decorator
@ct.electron
def add(x, y):
   sleep(10) # seconds
   return x + y

# ...

While the workflow is being processed by the dispatch server, you can terminate the Jupyter kernel or Python console process without losing access to the results.
What to Do Next#
Read Concepts gain a deeper understanding of how Covalent works.
See the Tutorials to see how to apply Covalent to real-world machine learning problems in a variety of subject domains.
See the API Reference for usage information on electron, lattice, and ready-to-use executors.
See AWS Plugins to see how you can specify an executor to run this example on an AWS node using only two more lines of code.