Quick Start#
To quickly install Covalent and run a short demo, follow the four steps below.
Before you start
Ensure you are using a compatible OS and Python version. See the Compatibility page for supported Python versions and operating systems.
Type the following in a terminal window:
$ pip install covalent
In the terminal window, type:
$ covalent start
Covalent server has started at http://localhost:48008
Open a Jupyter notebook or Python console and run the following Python code:
import covalent as ct

# Construct manageable tasks out of functions
# by adding the @covalent.electron decorator
@ct.electron
def add(x, y):
   return x + y

@ct.electron
def multiply(x, y):
   return x*y

# Note that electrons can be shipped to variety
# of executors, for example, "local" computer
@ct.electron(executor="local")
def divide(x, y):
   return x/y

# Construct the workflow by stitching together
# the electrons defined earlier in a function with
# the @covalent.lattice decorator
@ct.lattice
def workflow(x, y):
   r1 = add(x, y)
   r2 = [multiply(r1, y) for _ in range(4)]
   r3 = [divide(x, value) for value in r2]
   return r3

# Dispatch the workflow
dispatch_id = ct.dispatch(workflow)(1, 2)
result = ct.get_result(dispatch_id)
print(result)
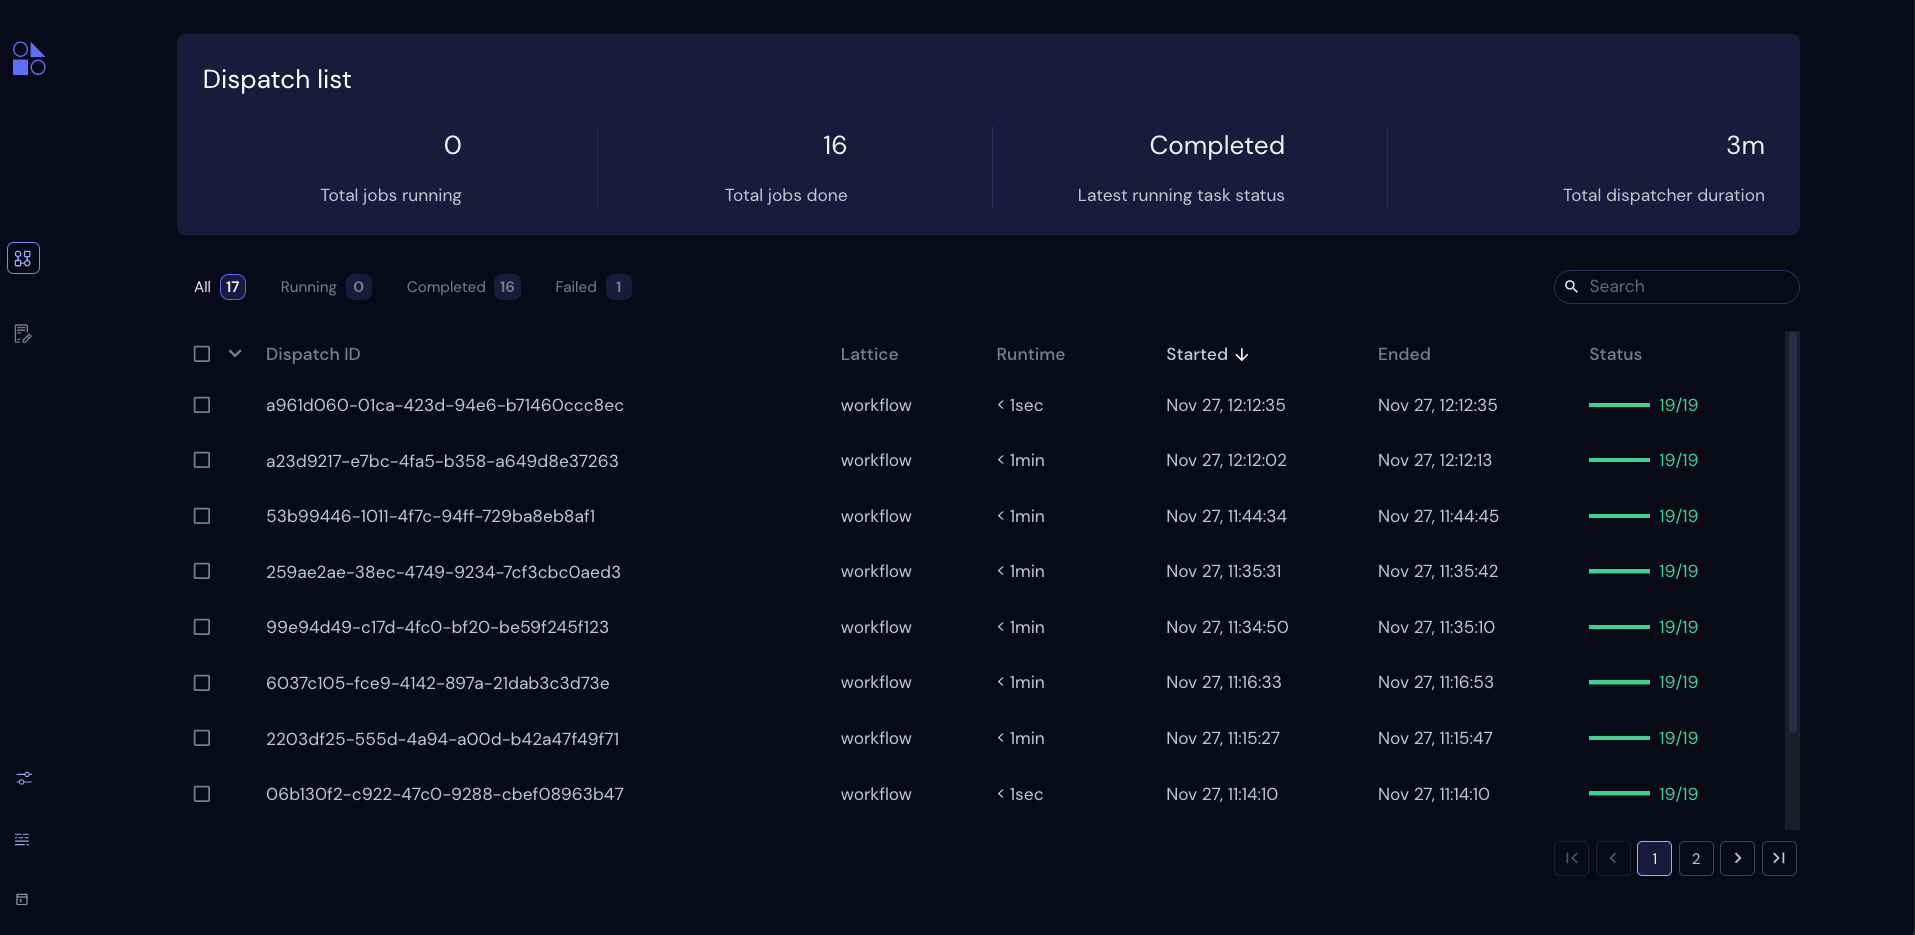
Navigate to the Covalent UI at http://localhost:48008 to see your workflow in the queue:
Click on the dispatch ID to view the workflow graph:
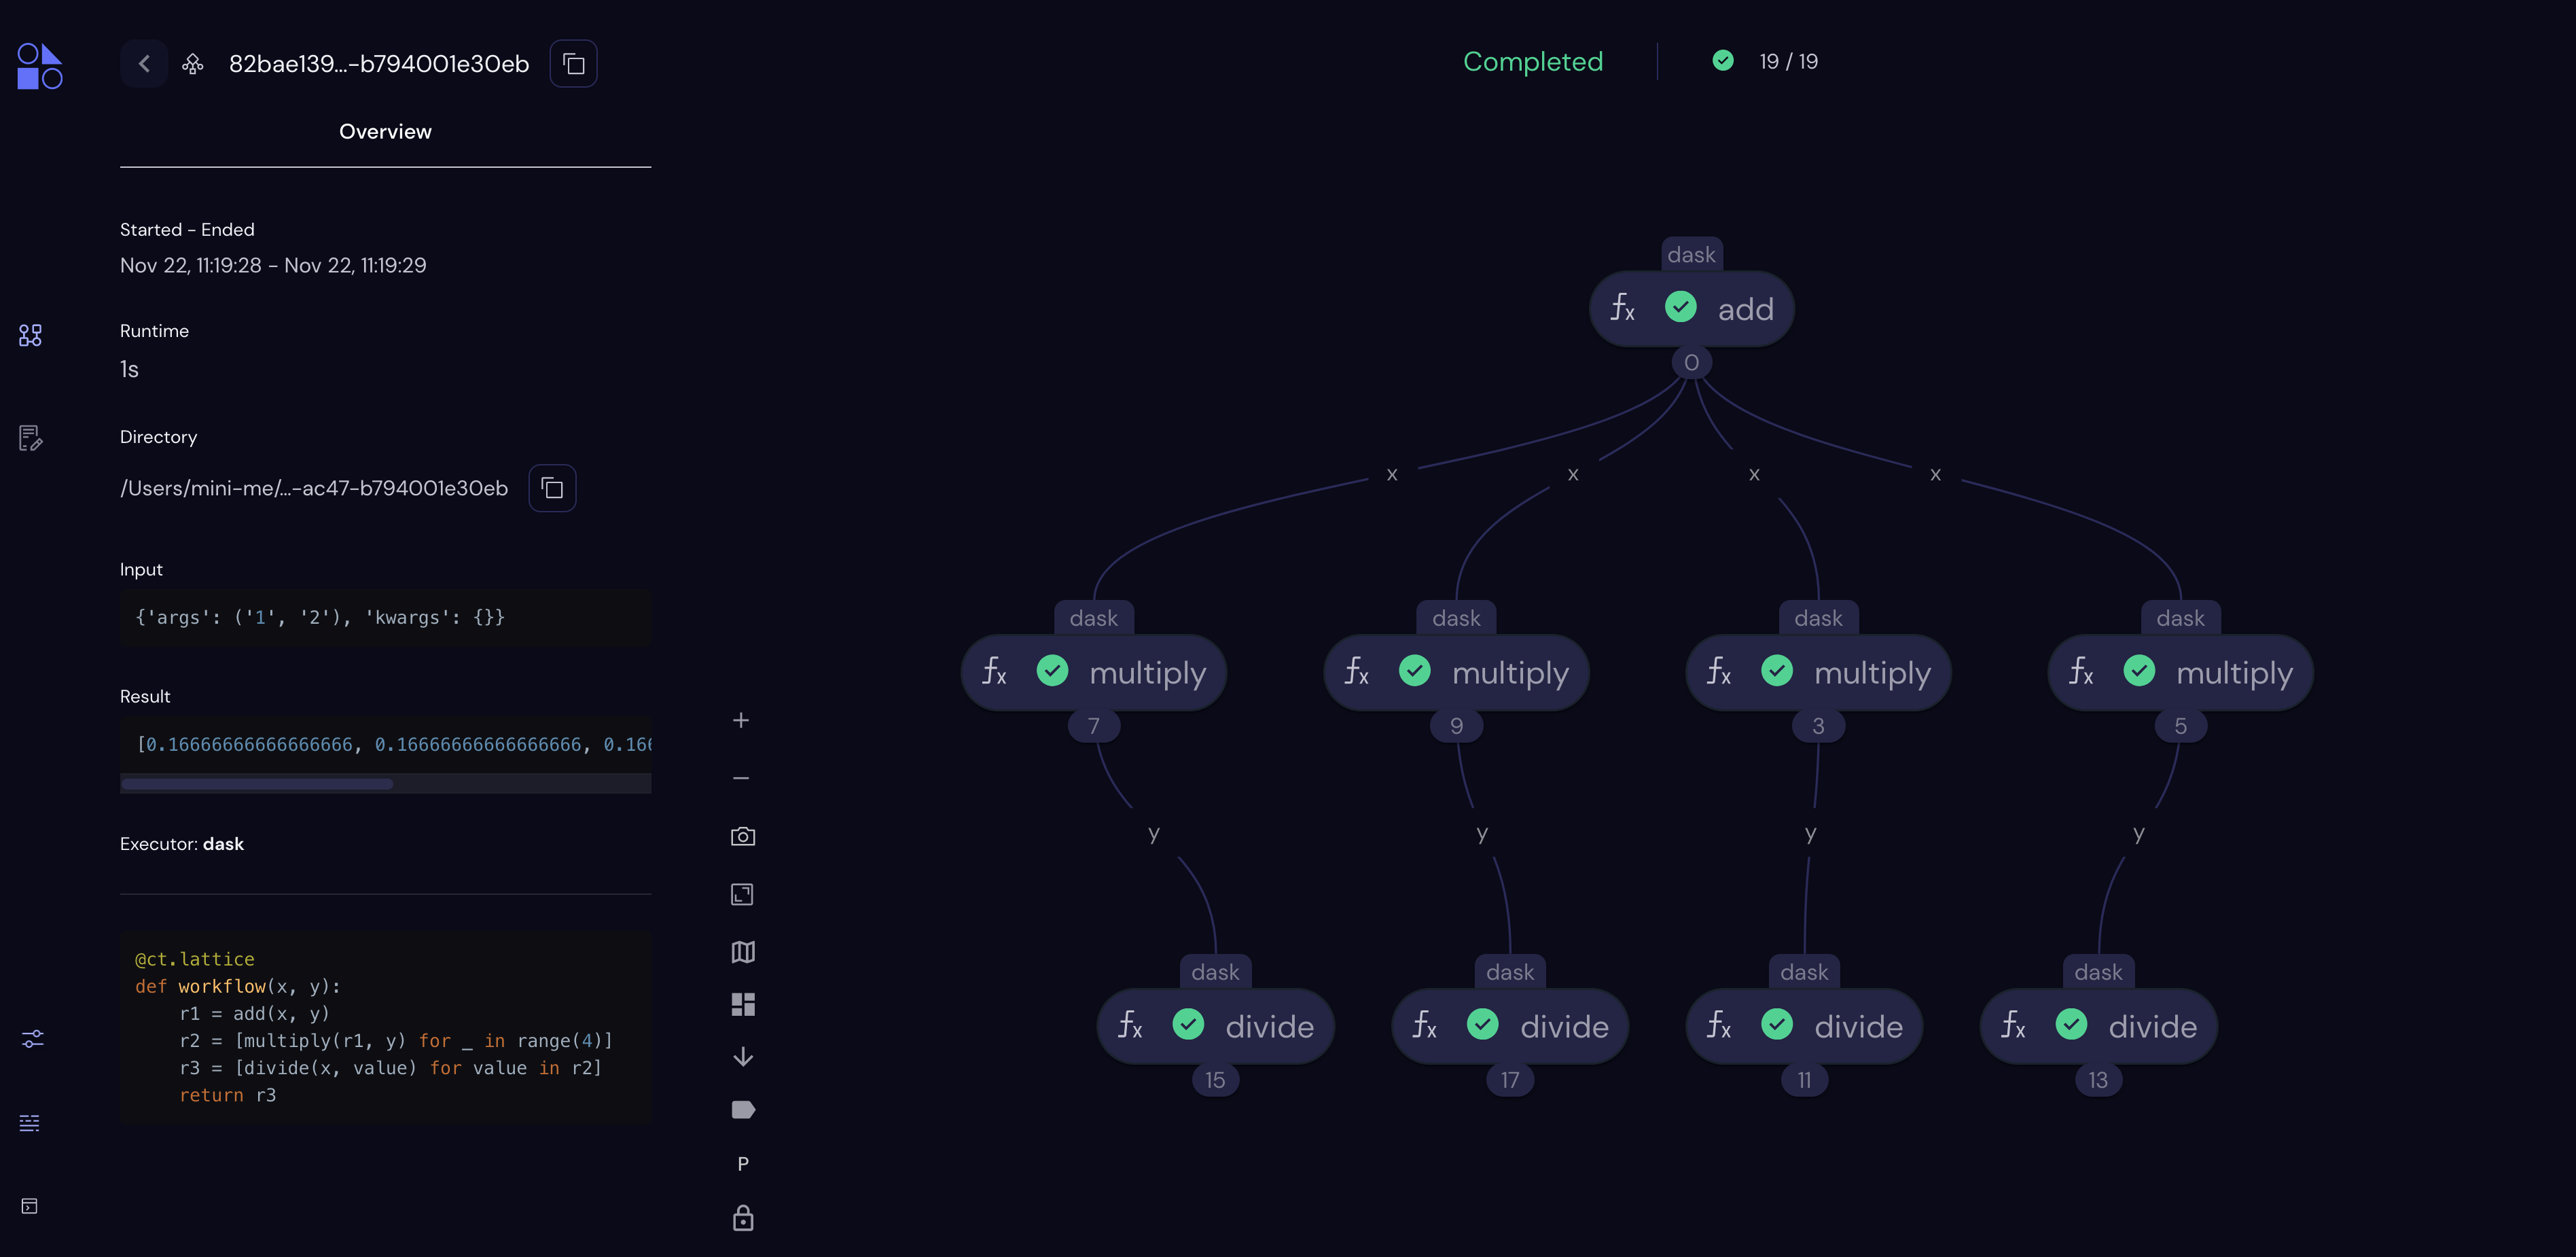
Note that the computed result is displayed in the Overview.
What to Do Next#
Read First Experiment for a more thorough discussion of the components of this simple workflow, including the important role of executors.
Read Concepts gain a deeper understanding of how Covalent works.
See the Tutorials to see how to apply Covalent to real-world machine learning problems in a variety of subject domains.
See the API Reference for usage information on electron, lattice, and ready-to-use executors.
See AWS Plugins to see how you can specify an executor to run this example on an AWS node using only two more lines of code.